Showing posts with label gluten-free. Show all posts

Saturday, February 21, 2015

Baked Spaghetti and 1 Year of Blogging

This dish can be prepared ahead of time
(even frozen if necessary)
and then baked just in time for dinner!


Pretty exciting week around here...
Not only did I make an often-requested and 
mouth-watering (which should go without saying)
meal for dinner...

It has also been one year since my first blog entry was posted.

So, if you have been around the whole time,
 just stumbled upon this recently or
check in from time-to-time…

I'm so glad you are here!  

Trying to wrap my mind around how grateful I am for this past year of blogging
is leaving me at a loss for words.  

I am so thankful for all of you who have followed my blog,
tried my recipes and even
gave me some feedback as to
how the recipe turned out, what else you would like to see or even how to grow my blog,
I'm honored to be part of your cyber and/or food family. 

This opportunity has given me a chance to grow, learn and push myself into new territories,
which is both fun and scary at the same time!

Blah, blah, blah...
I know, same ol' mushy stuff,
Bottom line...
I'm so thankful for where I'm at and excited about where this will go from here!

Now, on to something way more exciting…
Baked Spaghetti. 

My kids, specifically Landon, probably requests pasta at least once a week.
Since Jerry and I are still mostly gluten-free,
pasta, as far as Landon is concerned,
doesn't really register on my radar.

My versions of pasta are usually spaghetti squash or zucchini noodles.

So, after repeat reviews of how fabulous Barilla's gluten free pasta is, 
I thought I'd indulge the family with this hearty and satisfying dish.


Nothing fancy here,
just boiling 1# of Gluten Free Spaghetti.


And, browning up 1# of Italian Sausage.


Next up, simply add 2 cans of diced tomatoes to the cooked sausage.

If you have pasta sauce that you prefer, go right ahead.
I've been rationing my cupboard staples a bit lately and was very happy how this 
makeshift sauce turned out.  


While the pasta was boiling,
whip up 2 eggs, 2 tbsp grated parmesan cheese and 1/2 stick of butter - softened.


Pour it upon the drained spaghetti noodles


And stir.


The noodles are layered into a 9x13 baking dish.


Covered with the sausage and tomatoes.


And sprinkled with a cup or two of shredded cheese.

Cover with foil and baked at 350 F for about 30 minutes


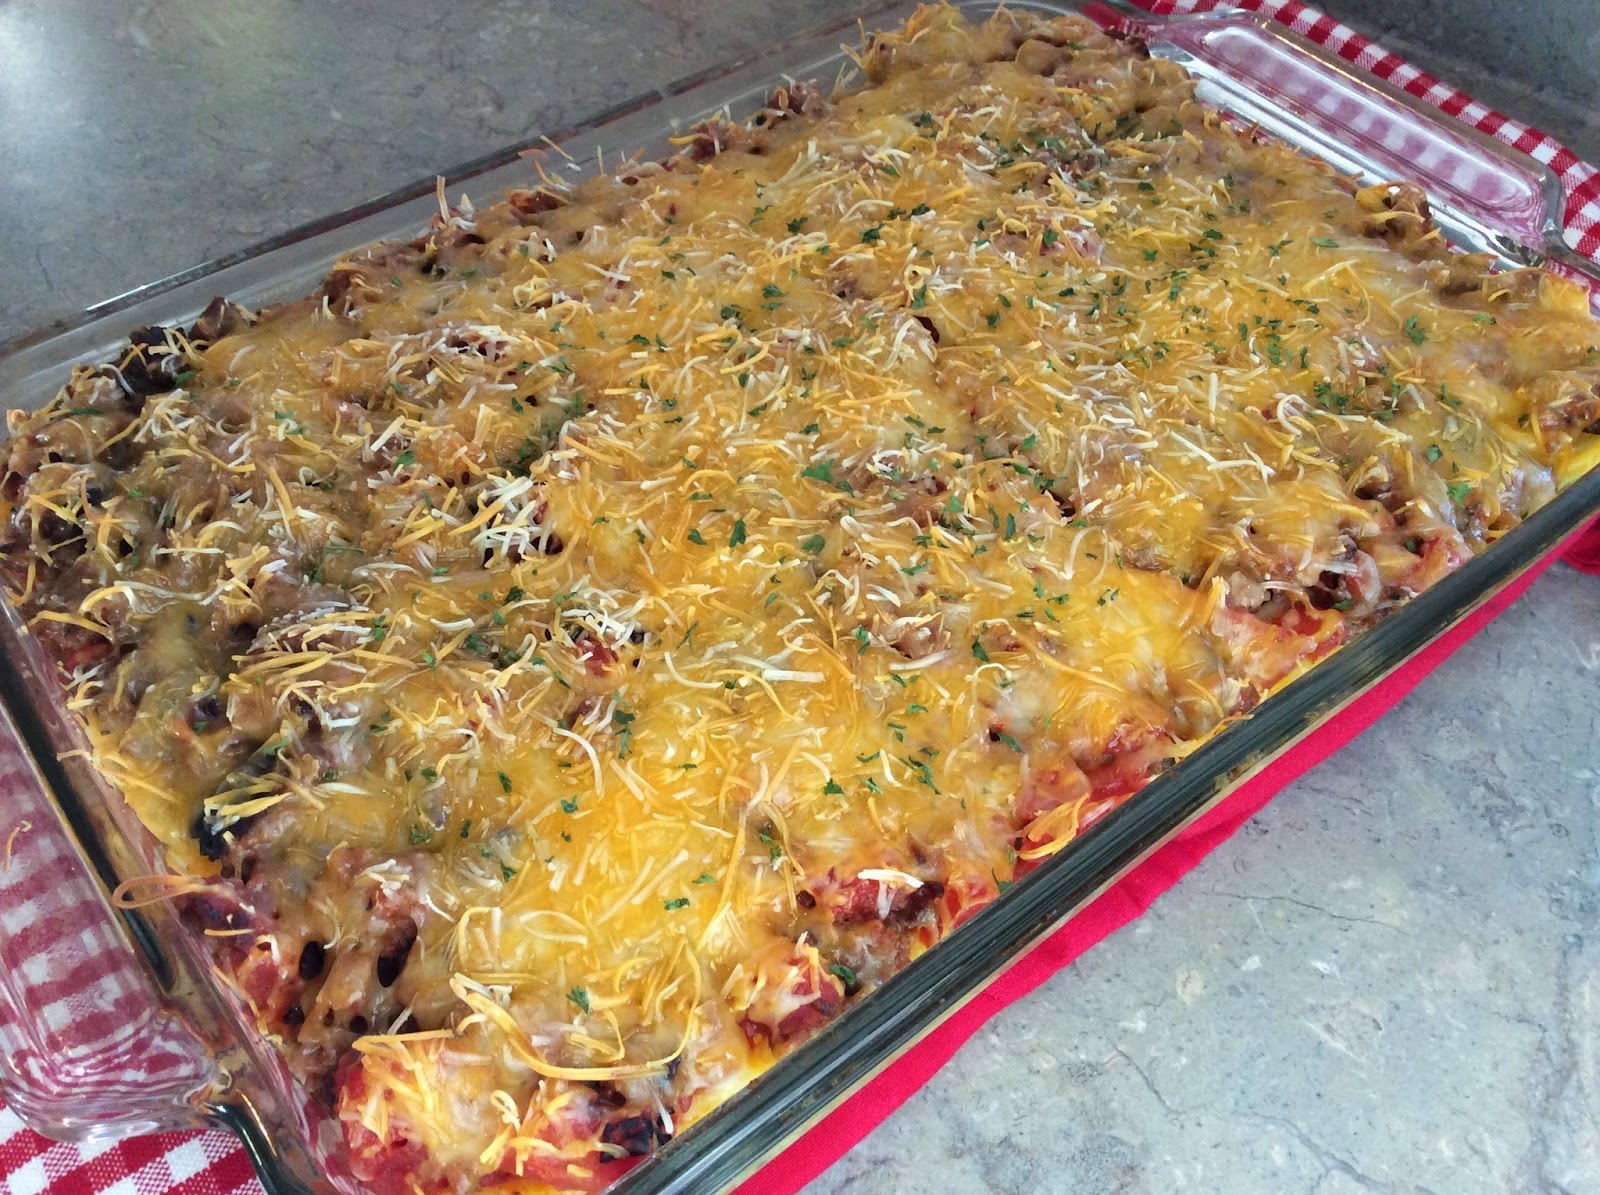
Sprinkle with some parsley and serve.

RECIPE:
Prep Time: 30 minutes
Bake Time: 30 minutes
Serves : 8

Ingredients:
1# of Gluten-free Spaghetti - Barilla
1# of Italian Sausage
2 cans of diced tomatoes
2 eggs
2 tbsp grated parmesan cheese 
1/2 stick of butter - softened
1-2 cups of shredded cheese
Parsley 

Directions:
  • Boil pasta according to box. 
  • Brown sausage until no pink is left. 
  • Add diced tomatoes or pasta sauce
  • Whip up eggs, parmesan cheese and butter. 
  • Drain pasta and add egg/butter/cheese mixture. 
  • Top with shredded cheese and cover with foil.
  • Can now be frozen for another meal.
  • Bake at 350 F for 30 minutes until warm all of the way through.

Tuesday, February 17, 2015

Creamy Chicken Tortilla Soup in a Slow Cooker


Here we are at the heart of winter…
would love just a bit more snow to be able to get out and enjoy the outdoors,
but if I can't give you that or a warm beach vacation somewhere,
at least I can provide some meal ideas 
which is slow-cooker-easy and oh-soooo-good! 

The inspiration for this soup was found on 
and of course, I changed things up as I went.  

This was made in a slow cooker, 
(because I love to throw everything in one pot in the morning
and feel like I've slaved over it all day)
but could certainly be converted to stove top
by cooking the chicken, 
adding the veggies and simmering to your heart's content.


It certainly doesn't look very pretty getting started, 
but in this vessel you will find
2 chicken breasts
2 cups of chicken broth (I always tend toward thicker soups)
1 can of enchilada sauce
2 cans of black beans (no need to drain for a dish like this)
1 can of green chilies
1 can of diced tomatoes. 


When I got home from work, after 8 hours on low and 
added 16 oz of thawed frozen corn,
it looked something like this. 


Took the chicken breasts out for shredding.


That's a lot of shredded chicken from just 2 breasts. 


While shredding the chicken,
8 oz of low fat cream cheese was added
for the beloved creaminess it brings!


By the time the chicken was returned to the soup,
the cream cheese was melting away. 


And, within minutes, 
the soup was rip-roaring, ready to go! 


Served with some diced avocado and a dash of chili powder,
this soup was gone in no time! 

Wish I would have made a double batch!

**Famous last words!**

RECIPE:

Prep Time: 10 minutes at the beginning and 10 minutes at the end
Cook Time: 8-10 hours on low, 4-6 hours on high

Serves: 6

Ingredients:
2 chicken breasts
2 cups of chicken broth 
1 can of enchilada sauce
2 cans of black beans
1 can of green chilies
1 can of diced tomatoes
16 oz of thawed frozen corn
8 oz of low fat cream cheese

*Garnish
Diced avocado 
Chili powder

Directions:
  • Place chicken, broth, sauce, beans, chilies and tomatoes into pot and cook on low for 8-10 hours or on high for 4-6 hours. 
  • Remove chicken breasts and shred. 
  • Add corn and cream cheese, stir to melt and incorporate. 
  • Return chicken to soup and combine well. 
  • Serve with avocado. 


Wednesday, February 4, 2015

Chicken Broccoli and Quinoa Bake


Well, hello there. 
Today I'd like to share with you a fabulous
One-Dish-Wonder…

They are most certainly my favorite! 

I mean, really,
does it get any better than having
Protein  (Chicken), Veggie (Broccoli), Carbs (Quinoa)
and
(wait for it)
FLAVOR 
all is one dish!?!?!

This whole quinoa-thing is around to stay in my house. 
My kids prefer it over rice and
I would gladly serve it more…
but there is a price point on it, 
(which is a small price to pay for a carb with protein and fiber!)
so I limit it to about once a week. 

This was so easy…
dump it all into a dish
and bake! 

Gotta love the no-brainer dinners! 


This is what 1 cup of quinoa and 2 cups of chicken broth look like in a dish. 


Next, 2 cups of broccoli florets were added. 

(This made for some mushy broccoli, 
if you prefer your broccoli to have a little more texture, 
add it later!)


About 3# of chicken breasts
(which, did you know are less expensive than tenders!)
were cut into tenders and sprinkled with 
poultry seasoning and seasoning salt
to your liking. 

Ready to be popped into a 400 F oven. 


After 30-40 minutes, 
I have to admit that I was mesmerized by watching the quinoa cook…
this dish was ready to go! 


There is, of course, the optional cup of shredded mozzarella
And, if you wanted crunchier broccoli, 
that could be added at this time instead of at the beginning. 

It may alter the overall nutrition of this dish, 
but it helps to buy me a little more leeway with my next healthy endeavor, 
so I oblige. 

Pop it back in until the cheese melts
or put it under the broiler for some browning…
which I love! 


This dish it out and serve it up! 


RECIPE:

Prep Time: 10 minutes
Bake Time: 30-40 minutes
Serves: 8

Ingredients:
1 cup of quinoa
2 cups of chicken broth 
2 cups of broccoli florets
3# of chicken breasts - cut into strips
Poultry Seasoning - to taste
Seasoning Salt - to taste 
1 cup of shredded mozzarella

Directions:
  • Preheat oven to 400 F. 
  • Start with 2 cups of chicken broth and 1 cup of quinoa in the baking dish. 
  • Broccoli can be added now, if well done is the preference, other wise it can be added later. 
  • Layer chicken on top and season. 
  • Bake for 30-40 minutes until quinoa is translucent with an apparent spiral or germ present. 
  • Top with broccoli, now, for more texture along with shredded cheese, if desired. Bake for another 5-10 minutes.


Thursday, November 6, 2014

Cranberry and Rice Stuffed Acorn Squash


Let's talk about squash

Does that word rub you the wrong way the same way it does me?

When I was a kid, I wouldn't have been caught dead eating squash, 
I probably would have rather had brussel sprouts (which I'm STILL not a fan of)
 than squash

Thankfully there is zucchini,
the gateway squash, 
as I've always enjoyed zucchini and while I've hated the idea of squash,
I figured that if I liked zucchini, 
then maybe the other squashes couldn't be too bad!  

Now that I have matured 
(insert another thankfully here)
I am so grateful for all of the varieties of squash
AND
all of the awesome recipes to make with them. 

Today I want to share with you 
Cranberry and Rice Stuffed Acorn Squash.

The combination tangy cranberries, chewy rice, creamy squash
and the fabulous flavors of Italian sausage,
this is one heck of fall festival in your mouth!  


This party started by browning 1# of bulk Italian sausage 
while the oven was preheating to 450 F. 


Then, the acorn squash was cut in half
and the seeds were scooped out. 

The baking started with 15-20 minutes at 450 F, 
cut side down,
until started to soften.  


Once the sausage was done, it was drained on a paper towel.

The paper towel helps to separate and collect the grease 
which prevents it from moving on to the next steps in the process. 

One cup of brown minute rice was added to 1 cup of boiling or broth
for a quick 5-minute cooking session. 


When the rice was nearly done, the sausage was added to the rice pan
along with 1/2 cup of dried cranberries.


And, viola, the gluten free stuffing is ready!  
And, looks delicious!  


After the first pre-cooking session, 
the squash was flipped over and coated with some butter. 


Piled high with the stuffing mix. 


Sprinkled with Parmesan and 
back to the oven for the next 20-30 minutes at 350 F until nice and soft!


These came out of the oven ready to be devoured. 

Perfect for these brisk, fall evenings. 


RECIPE:

Prep Time : 20 minutes
Bake Time : 35-50 minutes

Serves: 2

Ingredients:
1# bulk Italian Sausage
1 cup of minute rice - uncooked
1 cup water or broth
1/2 cup dried cranberries
1 acorn squash
4 tbsp Butter
Grated Parmesan cheese - to taste

Directions:
Preheat oven to 450 F. 
Brown sausage and drain well. 
Cut Acorn Squash in half and remove seeds. 
Bake cut side down for 15-20 minutes. 
Make 1 cup of Minute rice according to instructions. 
Combine cooked rice, sausage and cranberries. 
After the first 15-20 minutes of baking, flip squash over and butter. 
Reduce oven to 350 F.
Fill with cranberry, rice and sausage stuffing. 
Top with Parmesan cheese. 
Bake for 20-30 minutes. 


Monday, May 19, 2014

Banana Nutella Crepes (gluten-free!)


Hi y'all!  Hope you had a fabulous weekend!

I'm excited about some of the developments around the All Things Libby yard this weekend.

First of all, we have our garden plot ready to go, are so super excited about growing our own vegetables and sharing the experience with the kids.  Learning the basics about the simple joys of life, reaping the rewards of your labor.

There was an overgrown flower bed in the back corner of the yard and while I hated to lose what was nice, the whole thing was just OUT. OF. CONTROL!!!  Ask any of our neighbors.  So, I did salvage a few lilies and will place them elsewhere.

I'm a girl who is not afraid of a little hard work and am always thrilled when the whole family can be part of the fun!

We also picked up our first batch of annuals to plant for the summer.  I never really plan out my planters very well.  Just grab some old favorites and always like to try out something new.  Will head to  The Berry Basket again this week to round out the needs for the planters and garden.

Just love the local, personal feel of The Berry Basket, and they are only a mile from my house, so that helps too!

Other than all of the outdoor excitement, I had some indoor/kitchen success too.  After many iterations, these gluten-free Banana Nutella Crepes finally came together.

Not gonna lie…gluten free baking is harder than I thought!

With all of my food experience, making my way around a kitchen is generally a breeze.  I can whip up just about anything, anytime, for anyone, with little apprehension.  Sometimes, I start with the end in mind…give me a soup or dish and I can pull it off.  Other times, I pull out what I want to use and see how it comes together.

Well, taking the gluten out of crepes really tested my abilities, but I'm not complaining.  It was fun to experiment and learn, of course, the most rewarding part was the successful, delicious end result.

But, before I get to the recipe, I'm going to take you on a little trip down memory lane.

Twenty two years ago…when I was a wee teenager and my eldest niece was just an infant, my family and I ventured to Paris to meet this first member of the next generation.

Since I was all of 13 years old, I was not overly impressed with the French culture or much of the food (other than the bread), but those crepes did make quite the impression on me.  If I come across a picture of a homely teen eating crepes Paris, I will be sure to share.

While my parents enjoyed the Grand Mariner crepes, my brother and I devoured the Nutella crepes and luckily, those crepe stands in Paris are like Walgreens in Chicago…one of every corner.  Looking back, there was no doubt who the Americans were.

Ok, now that I have my warm fuzzy feeling, we can move on.

I won't bore you with all of the iterations that didn't work, I will just say that the proteins in nut flours do not function similarly to wheat flour.  Ultimately, I nixed the flour alternatives completely.

This amazing creation began by simply whipping up 3 eggs, 1/4 cup milk, 3 tsp sugar, 1 tsp vanilla and 1 tsp cinnamon (optional).

This should be a very thin batter, as crepes could be described as a very thin, eggy pancake.

I used a medium-sized pan, over low heat, so that the batter can be evened out in the pan before it starts to cook.

Coconut oil was perfect for this dish, just a teaspoon or so into the pan to melt, then wiped out, leaving just a thin layer.


Pour in a quarter cup of the batter and tilt the pan in all directions to even it out before cooking.

As it cooks, the edges will pull away from the side of the pan, a good indicator that the crepe is almost ready to be flipped.

Crepes are tender creatures, so flip with care!


The sugar in the batter is responsible for adding some browning and texture in addition to the sweetness.

Now, for the filling….


Just a perfectly ripe banana sliced up and fresh jar of Nutella.  


Start by slathering on the Nutella. 


Then added the bananas.  

I generally work in halves or quarters…beginning with the end in mind, so that the crepe can be folded...

first in half
then in half again, for devouring.  

The boys were not disappointed after having to wait a little longer than expected for this tasty breakfast.  


I mean, really, how can you go wrong with egg, bananas and chocolate for breakfast! 

RECIPE:

Ingredients: (makes 4 crepes)
3 eggs
1/4 cup milk
3 tsp sugar
1 tsp vanilla
1 tsp cinnamon (optional)
Coconut Oil

Directions:

Whisk all of the ingredient together until smooth.  

Melt 1 teaspoon over low heat in medium pan.  Wipe out excess, leaving just a thin layer behind.  

Add 1/3 cup of batter to pan, tilt pan in all direction to even out batter. 

Let cook until the edges start to pull away from pan and crepe is ready to be flipped. 

Flip and cook for a few more minutes on the 2nd side.  

Layer in Nutella and bananas, or your favorite sweet or savory filling. 

Fold into quarters and devour!  

Wednesday, May 14, 2014

Shredded Pork (Slow Cooker) with Coleslaw


As the spring picks up and the nights get busier, I know that I find it harder and harder to squeeze in home cooked meals around all of the games, practices and lessons.

So, even though it is (supposed to be) warming up outside, I still find myself going back to my slow cooker so that there is something ready and waiting for us to get home.

It also helps to fend off the temptation to eat another meal out knowing that there is a food awaiting our return.  I'm just a firm believer in home cooked meals.  They are better for both the waistline and wallet!

Last weekend we had at two afternoon games and since the troops and I would be returning home hungry right at dinner time I turned to the slow cooker to save the day.  This time for some tasty, tender and delicious shredded pork.

While Jerry was shredding the pork, I whipped up some home made coleslaw.   The crunchy, creamy contrast of slaw on barbecued pork is the perfect compliment to the smoky meatiness.

The shredded pork started with a 4.5 lb pork shoulder, on low, in the slow cooker, for most of the day, 8 hours to be exact.

Since the roast was on the bigger side, there were plenty of leftover, thankfully!  Seems like the guys in the All Things Libby house all have bottomless stomachs!  


The seasoning consisted of one chopped onion, 2 tablespoons brown sugar, 3 tablespoons ketchup, 3 tablespoons yellow mustard, salt and pepper to taste, all topped with 1 cup of vinegar.

I think I popped into the house just once during those 8 hours and stirred the marinade...spooned some of the juices back over the pork and let 'er ride!


What did our grandparents do in the days without slow cookers????  Those things are a godsend!

There is some sort of guilty pleasure over my family oooohing and ahhhhing over a meal that I hadn't thought about for 8 hours...but I'll take the credit and think you should too!


After the pork was shredded, I always add back some of the cooking juices, seems as though shredded meat seems to soak that back in when it is pulled, which keeps it tender, juicy and delicious!

The coleslaw was just 1 lb of the bagged cabbage and carrot blend.


The dressing consisted of one cup of mayonnaise, a healthy dose (about 1 tbsp) of seasoning salt, a teaspoon or two of poppy seeds, a teaspoon of freshly ground black pepper, 2 tablespoons of sugar, 1/2 cup cider vinegar and 1/2 cup of olive oil to thin out the dressing.

These ingredients can be adjusted according to your own personal flavor and texture preferences.


Stir the cabbage and carrots with the dressing and get it ready to serve with the pork.

This was the first time that we tried Udi's Gluten Free Hamburger buns (picture at the top) and I think that Jerry was pleased.  At least he had some bread to enjoy this saucy, sweet, tangy, meaty meal with.


RECIPE

Shredded Pork

Ingredients:

4.5 lb pork shoulder
1 chopped onion
2 tablespoons brown sugar
3 tablespoons ketchup
3 tablespoons yellow mustard
Sea salt 
Fresh ground black pepper 
1 cup of vinegar

Directions:
Place the roast in the slow cooker, top with marinade/seasoning ingredients.
Cook on low for 8-10 hours, stirring occasionally.  


Coleslaw

Ingredients:

1 lb of the bagged cabbage and carrot blend

1 cup of mayonnaise
1 tbsp of seasoning (or celery) salt
A teaspoon or two of poppy seeds
A teaspoon of freshly ground black pepper
2 tablespoons of sugar
1/2 cup cider vinegar
1/2 cup of olive oil

Directions:

Whisk up all of the ingredients to make the dressing, add in the cabbage blend and serve.