Sunday, November 16, 2014

Bacon Wrapped Stuffing Balls


Hope you had a great snowy weekend!

I have to admit, that I don't object to the snow this weekend…other than the horrendous drive home last night from basketball.  The kids asked to go outside and play when we got home at 9 pm and they were surprised that I agreed.

Then, today the kids were outside playing for hours with various neighbor kids…which was wonderful in itself and great because it was many more hours than they would have played outside had there not been snow on the ground.

I know it's a bit early, but it feels festive and gives people of all ages a great reason to get outside and enjoy the outdoors.  

At least Thanksgiving is less than two weeks away, so the holidays are nearly upon us and I have a fabulous upgrade to an already delicious holiday staple.

Picture this scenario...

What if you told your family, "Hey, we're not having stuffing at Thanksgiving this year…."

Can you imagine the dissatisfaction?!?!

Until, you announce, "We're having Bacon Wrapped Stuffing Balls instead!"

They might forgive you then!

These are just amazing, 
but don't take my word for it…
give them a try yourself! 
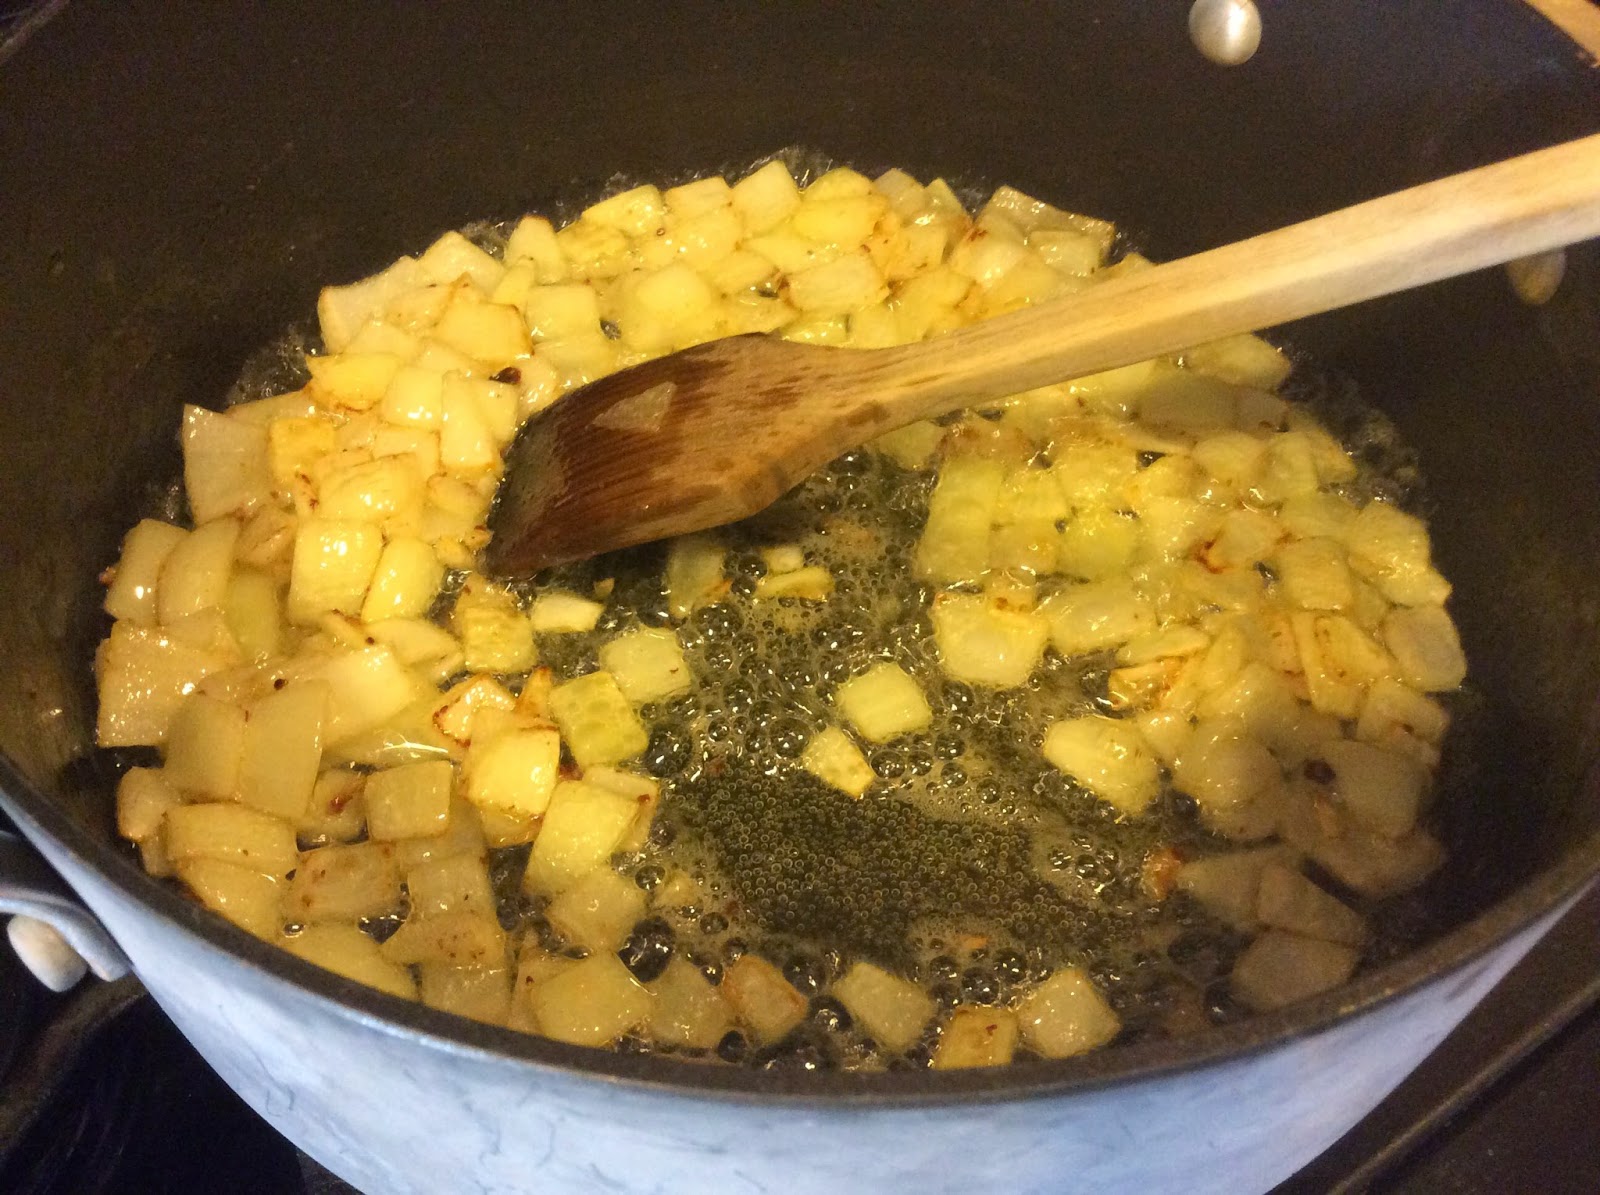

Just start with softening 1 medium, chopped onion in 1/2 cup of butter. 


While the onion is getting started, the bacon got pre-fried a bit too. 

I have enough bacon-wrapped experience
 to know that the final dish is just a little better 
if the bacon has been pre-fried a bit first.

Provides some of that fabulous bacon-y texture that we all love while cooking off some of the fat.  

The key in pre-frying is to ensure that it doesn't get too done.  
It still has to be soften enough to be pliable,
not so brittle that it crumbles.  

If that happens, just throw it in with the stuffing as the next best option!


Back to the onions and butter. 

Add 3 cups of chicken broth and bring it to a boil. 


Once boiling, remove from heat and
 add about 7 cups of cubed and seasoned stuffing. 

If you are all about the home made stuffing, 
I commend you. 

Problem is that we don't generally eat much bread around here, 
so I didn't have anything to stale.  


Stir the stuffing and broth well. 
And just keep stirring because it will take a while for the stuffing to absorb the moisture. 

Feel free to give it a few minutes, 
(check on the bacon)
and come back for more stirring. 

It is OK if the stuffing begins to break up. 
It needs to be rather soft to form into the stuffing balls. 


Scooping out about 1/2 cup of stuffing, 
form into balls. 

These are about a single serving size. 

However, anyone who really loves that Thanksgiving food-coma,
may want more than one of these. 


All 9 stuffing balls, got their own little piece of heaven, uh, I mean bacon. 

Secured in place by a toothpick. 

Baked for 350 F for 30 minutes. 

I can't really say enough good things about these….

If you ever are tempted to jump off the gluten bandwagon, 
these would be the best possible reason!  


Bacon Wrapped Stuffing Balls
Recipe:

Prep Time : 15 minutes
Bake Time : 30 minutes

Serves: 9

Ingredients:
1/2 cup Butter
1 medium onion - chopped
3 cups chicken broth
7 cups of seasoned and cubed Stuffing Mix
1/2 lb bacon

Directions:
Preheat oven to 350F
Saute onion in butter over medium heat in a stock pan. 
Add 3 cups of chicken broth, bring to a boil. 
Remove from heat and add the stuffing mix.
Allow to sit and soak up the liquids. 

Lightly, pre-fry the bacon. 

Using approximately 1/2 cup of stuffing, form into a ball. 
Wrap with bacon and secure with a toothpick. 

Bake at 350F for 30 minutes. 

Wednesday, November 12, 2014

Sweet N Sour Chicken Meatballs

If you'd like a chance to win a batch of these for yourself,
just go to the All Things Libby Facebook page and
SHARE this recipe with your friends!  

A winner will be drawn from all those who share this recipe on Thurs. Nov 13th.
(I'm not afraid to ship it, if necessary!)


Happy Fall Y'all, although it is feeling a bit more like winter around here in southern Wisconsin. 
We will manage, we're tough like that! 

At least this time of year there is no shortage of comfort food and 
today I'm sharing with you a dish which has achieved a rare accomplishment 
in the All Things Libby world. 

I've made it twice.

And, not just twice in my lifetime, or twice in a season…twice in ONE week!  

If that doesn't speak volumes about these Sweet N Sour Chicken Meatballs, 
I'm not sure what will.  

The first time I made them was for the Packer/Bear game on Sunday night 
when we were celebrating together with friends,
 not only did they FLY out of the slow cooker (perfect for a gathering), 
the guys kept asking for more and comparing how many they each got.  

Since Landon was sick and Jerry stayed home with him, 
neither of those guys got to take part of this awesomeness, 
that is quite possibly meatball perfection.  

Two of the things that I absolutely love about these meatballs is 
that they are made up of lean ground chicken and they are held together by oatmeal, 
which provides an awesome texture AND that means they are gluten free!  

While making home made meatballs may seem a bit too tedious, 
it really only took me about 15 minutes to mix 'em up and roll 'em out.  

And, if you haven't gathered by now…they are so worth it!  


So, into my trusty mixing bowl, add 2# of lean ground chicken
(Don't even both dealing with any less…even nearly 4 dozen are scarfed down in no time!)
1 cup oatmeal
1 medium onion, chopped
2 eggs
2 tsp salt


I have to recommend that you just dig right in and mix this up with your hands. 
Nothing else does as good of a job and 
you are going to have to get your hands dirty anyway. 


Place the formed meatballs onto a foil lined, sprayed pan. 
Pop them into the oven for 15-20 minutes at 400 F. 


I love the fact that they don't shrink very much 
since they are so lean to begin with and don't have a whole bunch of fat baking out. 


Then, the meatballs were placed in the slow cooker. 

Even when we had them at home, like last night, 
I still prefer the slow cooker so that they sauce can reduce and bake into the meatballs a bit. 


The sauce starts out with about 1/2 cup of French dressing and 
1/2 cup of BBQ Sauce. 


Then 1 can of pineapple and 1 tsp of garlic powder
are added to finish it off. 

How easy is that!?!?!


Pour it over the meatballs, give it a gentle stir and let 'em ride. 

You know the drill…
on high for 4-6 hours
on low for 8-10 hours


Top 'em off with some sesame seeds and green onions for the finishing touch. 


RECIPE:
Prep Time: 20 minutes
Bake Time: 20 minutes + slow cooker

Ingredients:
2# of lean ground chicken
1 cup oatmeal
1 medium onion, chopped
2 eggs
2 tsp salt
Cooking Spray
1/2 cup of French dressing 
1/2 cup of BBQ Sauce
1 can of pineapple
1 tsp of garlic powder
Sesame Seeds
Green onions - sliced

Directions:
Preheat oven to 400 F. 
Mix together the chicken, oatmeal, onion, eggs and salt until thoroughly combined. 
Roll out into about 48 meatballs. 
Place onto a foil lined baking pan and top with a thin layer of cooking spray. 
Bake for 15-20 minutes. 
Place into slow cooker. 
Mix up sauce by pouring together dressing, BBQ sauce, pineapple and garlic powder. 
Pour sauce over meatballs and set the slow cooker according to the time until serving. 


Tuesday, November 11, 2014

Sun-dried Tomato and Pesto Baked Brie Dip


This is a colorful, flavorful European inspired dip combines the 
French cheese which is creamy and mild with the sweet and aromatic Italian Pesto. 
The sun-dried tomatoes offer the perfect tanginess to round out this crowd-pleasing dip.


Start with 8 oz of Brie Cheese carefully cut off the rind and into chunks.

The rind is completely edible, so that is a personal preference to remove it. 
Thankfully, there is nothing to worry about if some is left behind.  


To the chunked Brie, add 1/2 cup of drained Sun-Dried Tomatoes, drained. 

Sun-dried tomatoes are often packed in oil, 
so it is really important to drain them first to avoid having too much oil in the dip. 


Then, add 2 tablespoons of fresh, home made pesto to the dip. 

Click here for recipe. 

Gently stir up the dip and bake at 350 F for 15 minutes. 


Recipe:

Prep time = 15 minutes
Bake time  = 15 minutes

Ingredients:
8 oz of Brie
1/2 cup of Sun-dried Tomatoes - drained
2 tbsp Pesto 

Directions:
Preheat oven to 350 F.
Trim the Brie of the casing and cube. 
Add to small, shallow baking dish. 
Add tomatoes and pesto. 
Cover and bake for 15 minutes.

Stir gently and serve with Melba toast or veggies.


Slow Cooker Jambalaya


Happy Tuesday to all. 

I'm home again today with our youngest who is still fighting a fever.  
Poor guy!  

While being sick is never fun, at least when it is rainy and 35 F, 
spending the day snuggled in bed isn't such a bad alternative. 

Since I'm home, I can get caught up a bit!
I feel a bit like a slacker since I've noticed that this is only my 3rd post this month, 
but if you have seen the  Facebook feeds or the Janesville Gazette,
 at least I have a good alibi.

Making all of that food in one day (click here for recipes) 
was quite the cooking extravaganza and 
I am so thankful and humbled to have the opportunity to share my recipes with a broader community. 

Besides the upcoming holidays,
 I've been hearing some of you talk about warm, healthy, easy meals that are ready when you are!  

You are in luck….
I made this Jambalaya in the slow cooker a few weeks ago 
during our last soccer weekend.  
Just throw a few simple ingredients together and 
the fabulous aroma welcomed us into the house after the brisk afternoon at the field.  

Without further ado, let's get started!


Add two chicken breasts, whole, and 
one sliced up ring of smoked beef sausage 
 to the slow cooker. 

Just last year, I started adding my chicken to the slow cooker whole, 
as in, un-chopped.   

This is so much better!
Less mess because a raw chicken cutting board and knife are eliminated
and
shredding cooked chicken after a few hours in the slow cooker is just soooo easy!  

Actually, it practically shreds itself just removing it from the vessel. 

Anyway, back to the dish.  


Top the meat off with a 28 oz can of crushed tomatoes, 
1 cup of water and 1 chicken bouillon cube. 


As far as seasoning, I used 
2 tsp Cajun Seasoning
1 tsp ground oregano
2 tsp ground garlic
1 tsp ground thyme


And that's it!  

Stir it up and turn on high for 4-6 hours or low for 8-10 hours. 


When we got home, it had cooked down a bit. 

Remove the chicken for shredding.


Add 1 cup of minute rice, 

which cooks nice and fast in this hot environment. 


While the rice was cooking, the chicken was shredded and added back.  

So flavorful, so warm and hearty, really hit the spot!  


I'd definitely make a bigger batch next time…
maybe even double it, 
as the leftovers, minimal as they may have been, 
were at least as delicious! 

RECIPE:
Prep Time: 10 minutes
Cook Time: 4-10 hours in Slow Cooker
Served: 6

Ingredients:
2 chicken breasts
1 Ring of smoked beef sausage
28 oz can of crushed tomatoes
1 cup of water
1 chicken bouillon cube
2 tsp Cajun Seasoning
1 tsp ground oregano
2 tsp ground garlic
1 tsp ground thyme
1 cup of minute rice

Directions:
Add all of the ingredients, except the rice, to the slow cooker. 
Stir well and set on low for 8-10 hours or high for 4-6 hours. 
Just before serving, remove chicken for shredding. 
Add rice for cooking. 
Add back the chicken. 

Serve it up!  


Thursday, November 6, 2014

Cranberry and Rice Stuffed Acorn Squash


Let's talk about squash. 

Does that word rub you the wrong way the same way it does me?

When I was a kid, I wouldn't have been caught dead eating squash, 
I probably would have rather had brussel sprouts (which I'm STILL not a fan of)
 than squash! 

Thankfully there is zucchini,
the gateway squash, 
as I've always enjoyed zucchini and while I've hated the idea of squash,
I figured that if I liked zucchini, 
then maybe the other squashes couldn't be too bad!  

Now that I have matured 
(insert another thankfully here)
I am so grateful for all of the varieties of squash
AND
all of the awesome recipes to make with them. 

Today I want to share with you 
Cranberry and Rice Stuffed Acorn Squash.

The combination tangy cranberries, chewy rice, creamy squash
and the fabulous flavors of Italian sausage,
this is one heck of fall festival in your mouth!  


This party started by browning 1# of bulk Italian sausage 
while the oven was preheating to 450 F. 


Then, the acorn squash was cut in half
and the seeds were scooped out. 

The baking started with 15-20 minutes at 450 F, 
cut side down,
until started to soften.  


Once the sausage was done, it was drained on a paper towel.

The paper towel helps to separate and collect the grease 
which prevents it from moving on to the next steps in the process. 

One cup of brown minute rice was added to 1 cup of boiling or broth
for a quick 5-minute cooking session. 


When the rice was nearly done, the sausage was added to the rice pan
along with 1/2 cup of dried cranberries.


And, viola, the gluten free stuffing is ready!  
And, looks delicious!  


After the first pre-cooking session, 
the squash was flipped over and coated with some butter. 


Piled high with the stuffing mix. 


Sprinkled with Parmesan and 
back to the oven for the next 20-30 minutes at 350 F until nice and soft!


These came out of the oven ready to be devoured. 

Perfect for these brisk, fall evenings. 


RECIPE:

Prep Time : 20 minutes
Bake Time : 35-50 minutes

Serves: 2

Ingredients:
1# bulk Italian Sausage
1 cup of minute rice - uncooked
1 cup water or broth
1/2 cup dried cranberries
1 acorn squash
4 tbsp Butter
Grated Parmesan cheese - to taste

Directions:
Preheat oven to 450 F. 
Brown sausage and drain well. 
Cut Acorn Squash in half and remove seeds. 
Bake cut side down for 15-20 minutes. 
Make 1 cup of Minute rice according to instructions. 
Combine cooked rice, sausage and cranberries. 
After the first 15-20 minutes of baking, flip squash over and butter. 
Reduce oven to 350 F.
Fill with cranberry, rice and sausage stuffing. 
Top with Parmesan cheese. 
Bake for 20-30 minutes. 


Monday, November 3, 2014

Baked BBQ Monterey Chicken


Welcome to November and all of the wonderful things that come along with it,
including an extra hour in your day and brighter mornings.  

How did you use your extra hour yesterday?

We definitely felt less rushed all day and enjoyed a long evening
including baking as well as a couple games of Scattegories and Would You Rather?

I think we are going to have to implement some evening walks or something else active 
to break up the evening and fend off my desire to go to bed at 7 pm.

Despite having longer evening hours, 
I am certain that doesn't mean you want to spend more time cooking, 
so this easy Baked BBQ Monterey Chicken recipe is just the recipe for you.


Just start with a layer of BBQ sauce in the bottom of the baking dish.


Then, place the chicken in the dish.  
I used 4 large chicken breasts, about 3 lbs, that I cut into 3 tenders each.


The tenders were topped with more BBQ sauce and brushed to spread evenly.


Then baked at 375 F for about 30 minutes, until the chicken is cooked to 165 F.  


Finally, the BBQ chicken was topped with
shredded cheese and crumbled bacon 
 and broiled for the last 5 minutes before serving to your hungry dinner guests!


Knowing what I know now, 
I would have loved to serve these tasty chicken tenders over a bed of lettuce 
for a perfect combination of flavors and textures.


Seems like once the cooler temps move in, so do the cooked veggies, 
as I'm always looking for something to warm the body and soul.  

But warm and flavorful protein on a bed of lettuce 
would be an ideal combination!

RECIPE:

Serves 4
Prep time : 5 minutes
Cooking time : 35 minutes

Ingredients:
3# Chicken Breasts - cut into 3 tenders each
BBQ sauce of your choice - we use Sweet Baby Rays
2 cups Shredded Cheddar cheese 
6 slices of bacon - crumbled

Directions:
Prepare the 9x13 baking pan with a layer of BBQ sauce. 
Place the chicken tenders in the pan and top with more BBQ sauce. Spread evenly. 
Bake at 350 F for 30 minutes or until internal temp reaches 165 F. 
Top with shredded cheese and crumbled bacon. 
Broil for 5 minutes. 

Serve with rice and a salad.