Monday, July 7, 2014

Grilled Pizza: BBQ Chicken, Hawaiian (Pineapple) and Frozen


On a night like tonight, after running my AC all day to keep the house cool and comfortable, the last thing I want to do is turn on my oven for dinner and defeat the day's effort of the AC.

So, instead, I turned to my favorite summer time cooking method…the grill.


This was my first time personally experimenting with grilled pizza, specifically frozen, but it worked like a charm.  Preheat it like you do any over for cooking a pizza and throw it on.

In my opinion, Aldi has the best frozen pizza…crunchy crust, good sauce and decent toppings all for a great price.  I'm a big fan!


The timing was even pretty true to the package instructions, I may have overdone it a bit, but I happen to like my pizzas well-done.

Boys were elated to be having 'just' frozen pizza for dinner!  They do really well with all of my dinner experiments, but can't blame them for enjoying something familiar from time to time.  

As far as the two homemade pizzas on gluten free crusts, BBQ Chicken and Hawaiian, I thought as long as we are having grilled pizza, lets grill all the way.


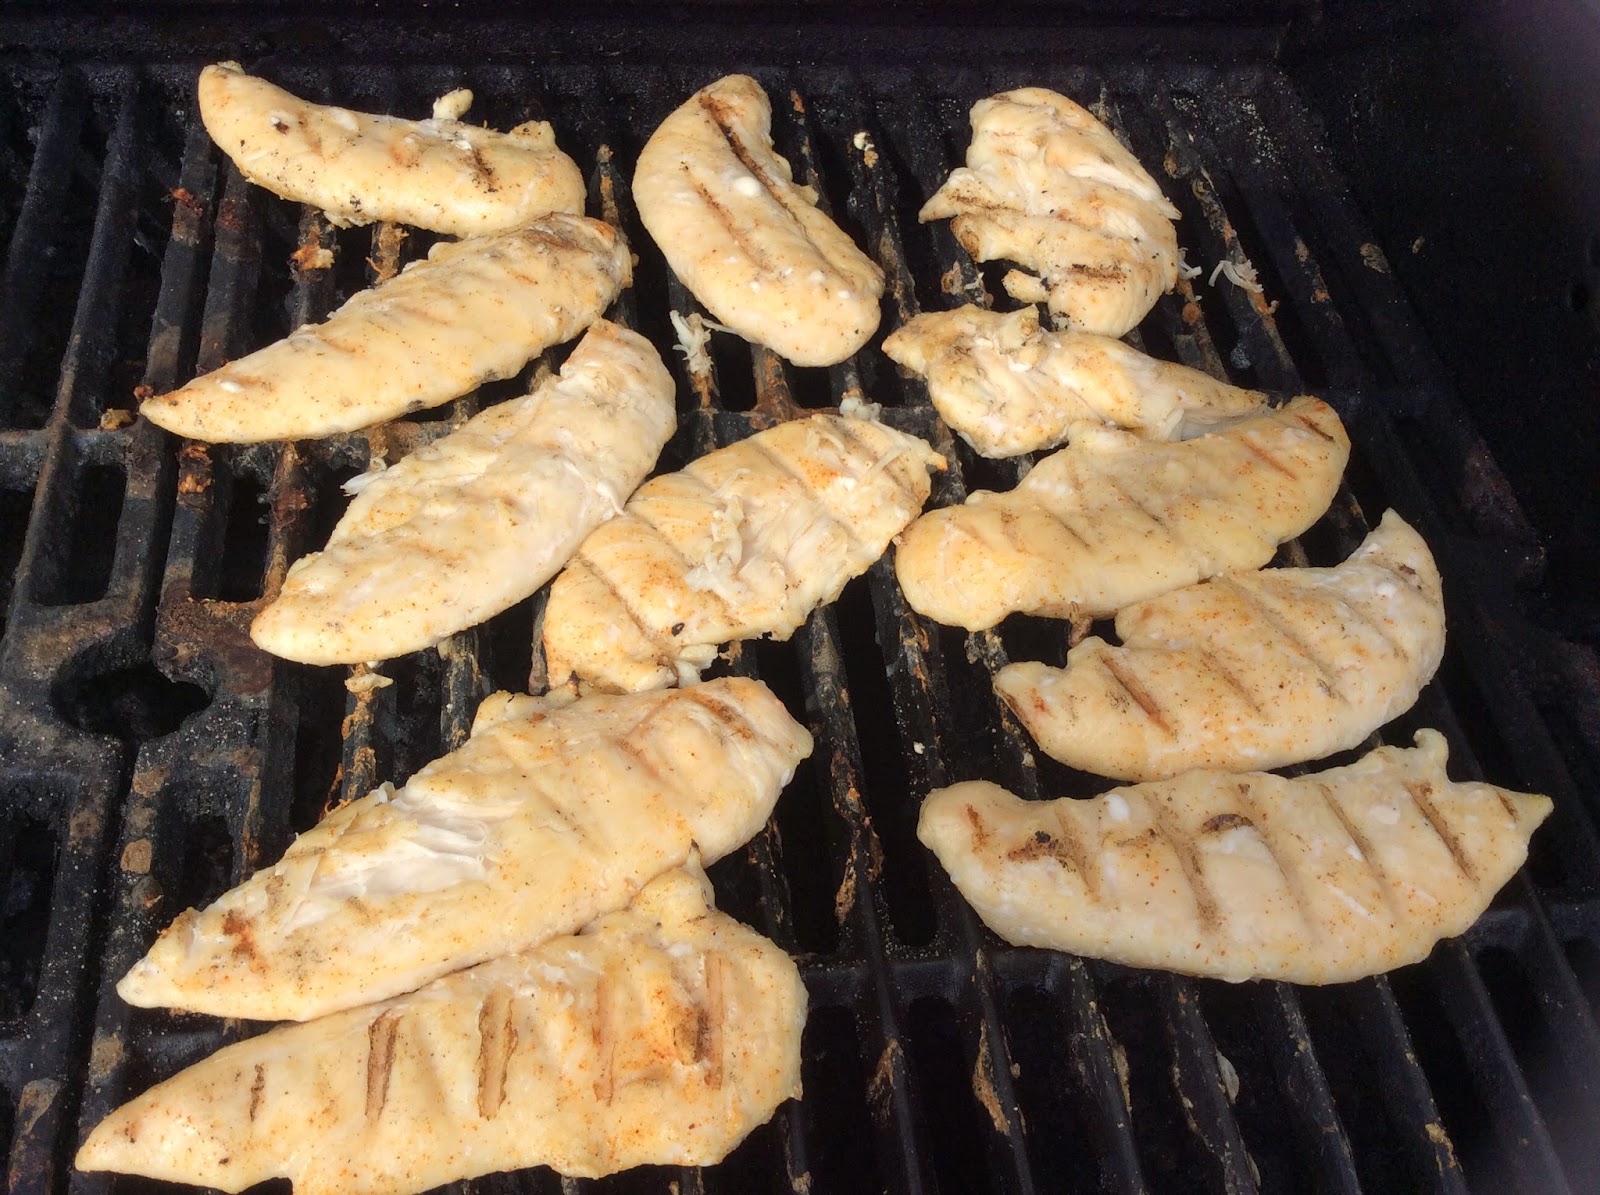
So, I started with some grilled chicken. 


And, just a couple spears of fresh, sweet, juicy pineapple. 

(Turns out this was a big hit with the kids and we had to make some additional pineapple kabobs sprinkled with cinnamon-sugar for grilling.)


While the pineapple and chicken were being prepared for pizza toppers, the gluten free crusts went on the grill for a little pre-cooking.  

I did this for two reason.  
1.  I hate a soggy crust and this would stop the liquid from the toppings from soaking in. 
2.  Provided a more rigid, less floppy crust for topping and grilling.  


For the Hawaiian pizza, start with tomato-based pizza sauce.


Add grilled pineapple, Canadian bacon and some grilled onions

If you have yet to try pineapple on your pizza, don't delay!  
MMMMmmm, the sweet, juicy pineapple is such a perfect contrast on a pizza.  
CANNOT GET ENOUGH!  


Finally top with mozzarella and this is ready for the grill.  


As for the BBQ Chicken….


The second homemade pizza starts with Sweet Baby Rays BBQ sauce, grilled chicken and onions


And, a generous layer of shredded cheddar.  


Both pizzas are placed on the grill and probably only needed about 10 minutes, especially since most of the toppings were freshly pre-cooked.


Pretty simple flavor profiles and so excited about the grilling potential.  

While hopping back and forth between the kitchen and the grill tonight, I informed Jerry that I would love to have an outdoor kitchen, so that I could have just put the pizzas together right outside by the grill instead of the constant back and forth.  

(I'm sure that's on his to do list for the weekend…oh, wait, no…it's baseball!)

Try whatever flavor profile you prefer with your favorite crust and enjoy the summertime pizza!  

Sunday, July 6, 2014

Rhubarb Risotto


Another great weekend is in the books, great memories with friends celebrating America's birthday and, of course, America's favorite past time, baseball.

I know we did lots of great things, but it all seems to be a bit of a blur right now,  I had a hard time keeping my days straight through such a great extended weekend of festivities.

One night last week, I was a bit perplexed about what to make for dinner.  Couple that with what to make with rhubarb and I was pretty excited when I came up with the idea to make Rhubarb Risotto.

I've had risotto sitting on my shelf for a while now and since it is gluten free, I was looking forward to making it sometime soon, but hadn't decided on what to pair it with.

The rhubarb, on the other hand, was staring me down and I got a gentle "I'm not a big fan of rhubarb" from my husband.

While brainstorming rhubarb recipes, there were, of course, lots of great strawberry/rhubarb crisp idea, of which I plan to make a gluten-free version of this week, there were also a few salsa and other savory type ideas.

Not sure what caused this brainchild, but I was excited about the idea and quite pleased with the result, as was my family!


Here were my starting ingredients, I did decide to add some minced garlic on the front end as well.


To get this party started, 2 shallots, chopped up and 1 tbsp minced garlic was added to a half of a stick of butter, over medium heat in a large dutch oven.

If you don't have shallots, just use onions, the shallots are a milder onion, but don't let that stop you from making this dish.  


While the garlic and shallots were sautéing until translucent (or clear), the broth got started over high heat in a neighboring sauce pan.  I didn't actually have any broth on hand (clearly soup season has passed), so I just used 6 cubes of chicken bouillon and 6 cups of water to serve the purpose.


Next, a good 2 cups of risotto were added to the dutch oven, sautéed and browned a bit themselves, until well coated in butter and giving a shiny appearance.

I think this is generally where wine comes into play…much to my dismay, I must admit that I did not have any white wine at home…not even sure how this happened. 

So, if wine is a requirement in the standard of identity for risotto, then I guess I have to call this something else.  

Life goes on, I can improvise with this best of 'em and I surely wasn't going to let the absence of wine ruin this dish.


Whenever I make risotto, this is what my set up looks like.  The boiling broth on one burner and the dutch oven with the risotto right next to it.

I just use my 1 cup measuring cup, dip it in the boiling broth and transfer it to the risotto about a half of a cup at a time, adjusting the heat between medium and medium low as necessary.

The key is to slowly add the broth and allow it to cook and absorb before the next addition of liquid.


After two or three cups of the broth have been added, the first cup of rhubarb was added.  Ultimately there were 2 cups of chopped rhubarb added to the risotto.

Since I was given the disclaimer before I even knew what I was making with it, I certainly wanted to tread lightly on the side of rhubarb.  

With lots of stirring attention, continue to add the liquid about a cup at a time until it is all incorporated.

At the end, it is ok to leave a little extra moisture because it will continue to thicken as it cools.

The final addition was a 1/4 cup of grated Parmesan, which was a really nice addition to balance out some of the tangy-ness of the rhubarb.

The rhubarb really cooked down and there was almost no piece identification to speak of, the only comment from the kids was that there were some strings, but it surely didn't stop them from having seconds.  

RECIPE:

Ingredients:
2 shallots, chopped up
1 tbsp minced garlic 
1/2 stick of butter
6 cubes of chicken bouillon
6 cups of water
2 cups of risotto
2 cups of chopped rhubarb
1/4 cup of grated Parmesan

Directions:
Sautee shallots and garlic over medium heat.  
Bring 6 cups of chicken broth to a rolling boil. 
Sautee 2 cups of risotto in with the shallots and garlic. 
Add the broth to the risotto about 1/2 cup of liquid at a time, stirring frequently, allowing the liquid to be absorbed before adding more.  
Adjust heat to medium low, as necessary.  
Add the rhubarb about half way through the addition of the liquid to allow ample time for the rhubarb to be cooked.  
Finally, mix in Parmesan just before serving, as a perfect finishing touch.  


Wednesday, July 2, 2014

Homemade Strawberry Jam - cost comparison


Greetings and happy July!  Can't believe we are here already...but life is good, so I'll just do my best to cherish everyday.

As the local berry season comes to a close, I went out for one last flat of strawberries...the jam that I have been making has been a huge hit around here, so I thought I'd try to get a few more batches done while the gettin' is good.

However, all of this jam making got me wondering…Is it really more cost effective to make my own jam or am I just providing my family with wholesome goodness?

Many of my former colleagues are probably getting a good chuckle out of this post because I spent the greater part of my career analyzing the cost to produce and trying to make everything and anything more cost effective.

So, it really shouldn't come as a surprise to anyone that I am constantly trying to find a more efficient way to do anything, including feed my family.


Strawberries (pick your own) $2.00/lb*2 lbs = $4
Sugar $1.49/9 cups = $.50 for 3 cups
Box of Less Sugar Sure Jell- $2.29

$6.79 = ingredients makes 7- 8 oz jars (56 oz) = $0.12125/oz

12 oz jar of smuckers jam = $2.19

12 oz of All Things Libby's Jam = $1.46

**Freezer safe jam jars = $0.66 each**

**I view the jars as a start-up cost, since they are re-usable.  
For my second batch, I was already using some of the jars over again, so then their cost goes down to $0.33 each and will continue to decrease every time they are used.  

So, after this brief analysis, I'm confident in saying that not only is my home made jam better for my family, but it is a more cost effective way to feed my family!  

As far as the jam making process, I followed the instructions on the sure-jell website, with, of course, just a few of my own revisions.

Most importantly, they specifically advise against pureeing the fruit.  

After fighting with the masher for a while, I decided to go with the blender and my kids (who are the main consumer of the jam) are thrilled with the consistency and ease of spread.


So, I'd definitely recommend the blender. 

Next, 1 package of Less Sugar Sure Jell pectin and 3 cups of sugar are mixed in a sauce pan, which is very important to do before the water is added.  

The nature of pectin and it's water absorbing properties, don't lend itself to being dissolved in water, unless dispersed in something like sugar, which dissolves easily.  

Add 1 cup of water to the sauce pan and bring to a boil for a full minute, while stirring constantly.  

The boiling process activates the pectin so that it will continue to absorb water as it cools, key to the fabulous texture of the jam.  


Finally, the sugar/pectin slurry is poured in with 4 cups of pureed strawberries and stirred for another minute to ensure the pectin is evenly dispersed.  

Pour the strawberry jam into jars, cover with lids and allow to cool on the counter for the first 24 hours.  


According to the instructions, this jam lasts 3 weeks in the fridge and 1 year in the freezer.  

By the way, there is no way this jam would last 3 weeks in my fridge….I can barely keep a jar around for a few days.  


Sunday, June 29, 2014

Curry Broccoli Salad with Bacon


Ahhhh, Sunday night….seems to be the most refreshing night of the week.  Perhaps it's because we all relax, inside the air conditioned house, eating pizza (which was delivery), watching TV and re-living the excitement of the weekend.

We started the weekend with another little adventure down to Rock Cut State Park in Loves Park, IL, just north of Rockford.  Wanted to get some hiking in during the afternoon since we were heading to Belvidere for Landon's baseball tournament anyway.


It took us a little while to find a starting point and get our bearings, but ultimately, we found a nice hiking trail and a creek, which was quite refreshing for the kids to splash around in a bit.


Before we continued on our way we had to get another picture…funny thing about these groupies, is that Landon doesn't want to get too close to Alayna, so instead, he is barely in the picture at all.

The time we spend together in nature is so precious, I am so thankful for the conversations, jokes and silliness, along with a few life lessons, that we share while alone together in the woods.  

On Saturday, we had a overdue and much-needed quiet morning, only scheduled outing was to the Janesville Farmers Market, which is a family favorite.  Then, after more baseball, we met up with some friends for the Freedom Fest fireworks…which is where today's recipe comes in.

Curry Broccoli Salad with Bacon was my dish to pass at the get together and it was a pretty big hit, if I do say so myself.

Another amazing combination of fabulous flavors and textures and with all of that broccoli, it is practically guilt-free!


This salad consists of almost all household staples, the golden raisins were the only special purchase I had to make for this salad.


Starting with about 5 cups of broccoli florets, added 1 medium onion, chopped, 1/2 cup sunflower seeds, 1 cup of golden raisins (could have been less, but was generous with them since I bought them especially for this recipe) and 6 slices of bacon, crumbled on top.


For the dressing, 1 generous cup of mayonnaise, 2 tsp curry power, 1/4 cup sugar, 3 tbsp apple cider all whisked together.


Pour it right over the salad. 


Stir it up and refrigerate.  

I really like the way that the broccoli starts to soften, just a little bit, and the raisins start to plump after sitting in the refrigerator for just a few hours.  


RECIPE:

Ingredients:

Salad:
5 cups of broccoli florets
1 medium onion, chopped
1/2 cup sunflower seeds
1 cup of golden raisins
6 slices of bacon - crumbled

Dressing:
1 cup of mayonnaise
2 tsp curry power
1/4 cup sugar
3 tbsp apple cider

Whisk up the dressing and pour it over the salad, refrigerate before serving. 

Anyway you mix it, still a great summer salad!  

Wednesday, June 25, 2014

Strawberry and Grilled Chicken Spinach Salad with Homemade Poppyseed Dressing (and the Cave of the Mounds)


Summer fun is in full swing and I'm taking advantage of my first summer home with my kids since maternity leave 10 years ago…

So, in addition to lots of delicious summery foods, we are also working on hitting some local attractions for our own family fun.


Last weekend was kicked off with a tour of the Cave of the Mounds in Blue Mounds, WI.  Some place I've always wanted to go so was excited for my first visit.

We arrived around 2:20 and the 2:30 tour was already sold out, so we got our tickets for the 3:00 tour and decided to explore the grounds a bit.


Whenever there is a chance to hit a nature trail and catch some serenity while being active, I'm game.  This family groupie was taken on the shorter and more lush loop of their hiking trails.

The tour is about an hour long and included a short intro video which helps get us novice cavemen on the same page.


The sights of the cave were quite amazing, especially when considering that the cave is still alive, forming, growing, changing while we are exploring it. 


They were quick to point out the cave bacon, which was a big hit with my guys. 


The colors and textures of the formations were breathtaking, just look at the contrast!  


Even in the cave we were all still smiling!  
Probably helped that it was nice and cool in the caves too! 


The flowing water through the cave is a large reason that this cave is still alive. 

Outside of the cave and back at home, summer meals are still in full swing.  While we did eat/jam up the first 20 lbs of fresh strawberries, I went back for more!  They are just too good to pass up! 


Besides, I had yet to make my Homemade Poppyseed Dressing served over Strawberry, Spinach, Grilled Chicken Salad.

A salad like this is so refreshing and as long as there is enough chicken, it should fill the family up as well.  


Just started with a bag of spinach, I did have to bulk it up with some romaine, otherwise there wouldn't have been enough for my hungry family.  


Added my first layer of sliced strawberries.  I love the sweet contrast of strawberries in this salad, so this is just the first of a few layers. 


Next, some chopped red onion.  I am not often a huge fan of raw onion, but chopped small enough and coupled with all of the right fixings, this just seems to work! 


Salad wouldn't be complete without something crunchy.
I had some slivered almonds on hand, but other nuts or sunflower seeds are always great adds.  


This layer of feta brought the perfect creamy element to this salad as a meal.  
Feta is nice and mild, so perfect for salads.  


These grilled chicken tenders, topped with seasoning salt, chopped into bite sized chunks, were the key to this meal.  


My family was salivating as they were watching me put this together.  


And, of course, more strawberries had to be added….


For the dressing, 1/4 cup sugar, 1 tsp salt, 1 tbsp grated onion, with my beloved microplane, 1/2 cup canola oil, 2 tsp poppy seeds, 1 tbsp vinegar and 1 tsp ground mustard (which is key for it's emulsifying properties….which means keeping the vinegar and oil mixed) were all whisked together and spooned over the salad before serving.  

I'm a huge fan of making my own dressing, in case you haven't noticed by now…I love knowing each and every hand picked ingredient in my dressings and I usually make just about enough for a meal anyway, so I don't have a half of a bottle sitting around for, uh, years!  


RECIPE:

INGREDIENTS:

Dressing:
1/4 cup sugar
1 tsp salt
1 tbsp grated onion
1/2 cup canola oil
2 tsp poppy seeds
1 tbsp vinegar
1 tsp ground mustard

Add all of the ingredients into a bowl and whisk up.  

Salad:
Spinach
Romaine
Strawberries - sliced
Red Onions
Almonds - sliced
Feta cheese
Grilled Chicken

Layer the salad fixing in a bowl, top with dressing and toss for a fabulous summer meal!